To say a massive thank you for the love & support from the Skinnymixers Community, I have been busy in the kitchen mixing up Skinnymixers 12 Days of Christmas!
There will be 6 new recipes and 6 favourites highlighted everyday from December 1st.
I thought it was fitting to start our 12 Days of Christmas with a Mango Fizz Cocktail!
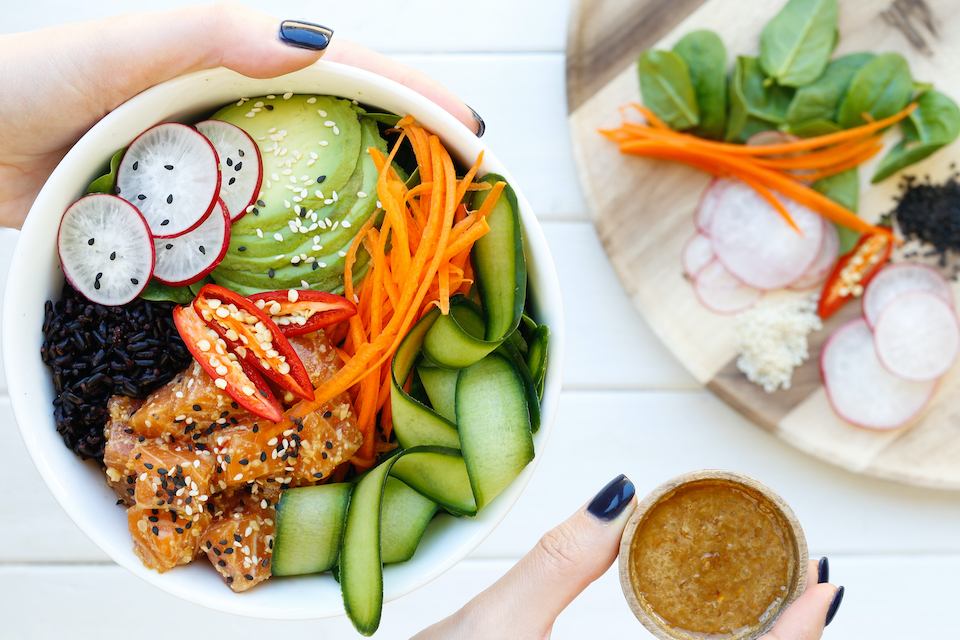
Is anyone else as obsessed with Black Rice as I am? I have always been a fan of contrasting textures in food, and black rice has that firm pop – while the sweet potato, avocado and feta are creamy. This is a beautifully vibrant salad to serve on your Christmas table, I recommend decorating it with some pomegranate seeds so its extra festive. If you are after a Honey Mustard Dressing, you can just make the dressing component of the recipe too 😉 Love Nik xx
I absolutely adore the nutty texture of black rice in a salad. If you haven’t already tried my Poké Bowl from The Healthy Mix IV, you absolutely must try it asap.
There is something about the black rice & the Poké Bowl dressing that just goes perfectly with rich raw salmon.
Black Rice & Sweet Potato Salad
Dressing
80 g light tasting olive oil
40 g lemon juice
20 g honey
20 g dijon mustard
2 pinches salt
Salad
400 g sweet potato (peeled, cubed into 3 cm chunks (approx. 1 medium))
200 g black rice
2 avocados (cut into 3 cm chunks)
50 g Danish feta (crumbled)
30 g pepitas
1 sprinkle pomegranate seeds (for colour)
Add all dressing ingredients to mixer bowl. Blend for 1 min/speed 7/MC on. Set aside.
Without washing bowl, insert simmering basket and weigh in rice. Take your simmering basket and rinse the rice well. Put the simmering basket back in place.
Weigh in 900 g water with the rice. Put your deep steaming tray in place with sweet potato. Cook for 25 min/steaming temperature/speed 3. You may need to remove your sweet potato early if it cooks – you don't want it to be too soft.
Let your rice and sweet potato cool completely then stir through remaining salad ingredients and dressing. Season to taste and sprinkle with Pomegranate if desired. You may also like to add a handful of baby spinach or rocket.
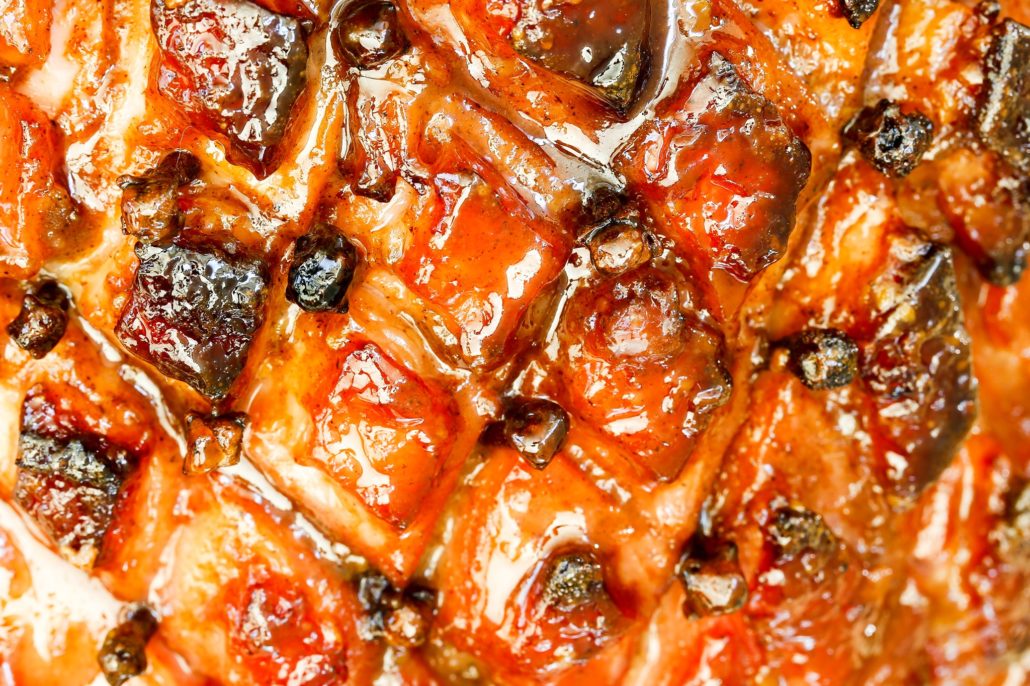
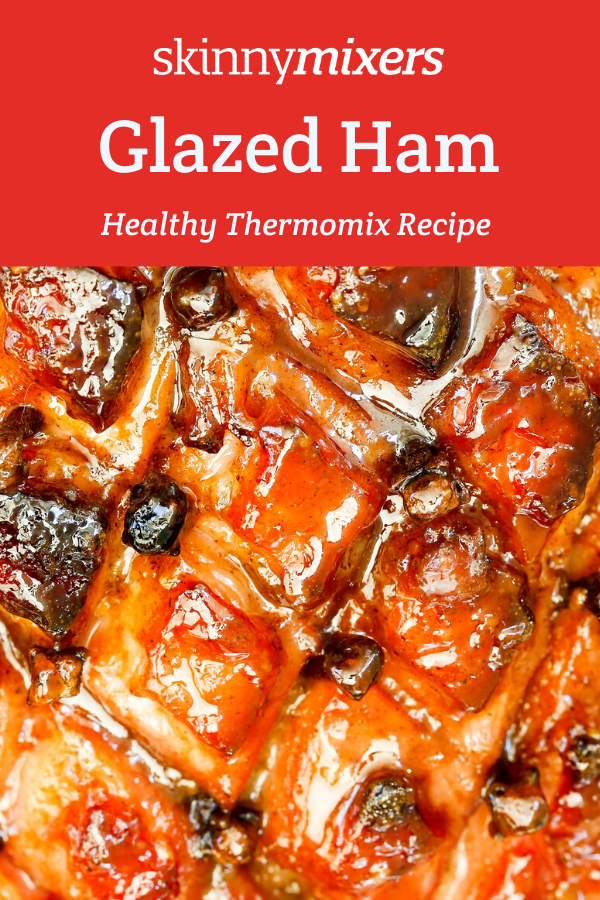
Glazed Ham was something I hadn’t experienced growing up and until I created this Thermomix recipe I couldn’t wrap my head around why people loved baked ham so much…It was something the Skinnymixers recipe development team had been asking for me to do every year and they’ve been working so hard these last few months, I thought it was time to reward them!
I was completely converted the moment I tasted this Glazed Ham fresh from the oven. While it still has a lot of sugar in it from the maple syrup, it is far less than other recipes traditionally used.
Looking for Christmas inspiration?
I have quite a few other healthier Thermomix recipes that you might like to try…
Preheat oven to 160°C. Prepare a roasting tray by putting a layer of baking paper on the bottom.
Prepare ham by carefully removing the rind with a sharp knife. You want to make sure you keep the fat attached to the ham meat. Discard the rind. Score the fat in a diamond pattern, about 1 cm deep. Press cloves in to the corners of each diamond.
Add maple syrup, dijon mustard, worcestershire sauce and cinnamon powder to mixer bowl. Cook for 4 min/100°C/speed 1/MC off.
Blend glaze for 5 sec/speed 7/MC on.
Put ham in baking dish and glaze with 1/3 of the glaze using a kitchen brush. Pop it in the oven for 1 hour and 20 minutes, glazing the ham every 20 minutes.
The nutritional information for this recipe is for the glaze only.
I have wanted to create a healthy cheesecake for years now and I finally got around to creating this beautiful Mango Macadamia Cheesecake Thermomix recipe just in time for Christmas and Australia’s Mango season. This will impress your guests, yet you don’t have to have extreme cake decorating skills to make this look amazing.
I absolutely adore the light coconut and macadamia base, but if you prefer a biscuit type base you could easily change it.
This healthier Thermomix dessert recipe is part of our 12 Days of Christmas this year.
Mango Macadamia Cheesecake
Base
160 g macadamia nuts (raw)
20 g butter (unsalted or coconut oil, room temp)
10 g sweetener of choice (honey, maple syrup, sugar, coconut sugar)
50 g shredded coconut
1 pinch salt
Mango Coulis
300 g mango pieces (frozen or fresh, as long as its ripe)
20 g sweetener of choice (honey, maple syrup, sugar, coconut sugar)
Cheesecake
500 g cream cheese (room temp, or toffuti for dairy free)
270 g light coconut cream (tin)
70 g sweetener of choice (up to 100 g for sweeter) (honey, maple syrup, sugar, coconut sugar)
1 Tbsp gelatine powder (I recommend Mckenzie's)
1/4 cup boiling water
Preheat oven to 180°C fan-forced. Lightly grease a springform pan and set aside. If you are using granulated sugar for the recipe, I recommend milling the entire lot now before proceeding for 20 sec/speed 9/MC on. Set aside.
Add macadamia nuts to mixer bowl. Chop for 2-3 sec/speed 7/MC on.
Add remaining base ingredients and blend for 30 sec/speed 4/MC on. Press firmly in to base of tin and bake for 7-10 mins or until lightly golden. Pop in the fridge or freezer to cool while preparing remaining steps.
Rinse the bowl and add coulis ingredients. Cook for 7 min/100°C/speed 1/MC off.
Blend coulis by slowly increasing the speed – 30 sec/speed 9/MC on. Set aside in fridge to cool.
Without washing bowl, insert butterfly and set your timer to 3 min/speed 4/MC on. Moving the measuring cup to the side slightly, slowly add each cube of cream cheese. Scrape bowl down.
Add coconut cream, half of the mango coulis snd sugar. Blend for 30 sec/speed 4/MC on. Scrape bowl down.
Stir together gelatine and boiling water in a cup, until no lumps remain. Set timer to 30 sec/speed 4/MC on. Moving the measuring cup to the side slightly, slowly drizzle in gelatine .
Pour cheesecake mixture over the base and refrigerate for 20 minutes to slightly firm up, don't forget about it or your swirling wont work! Take your remaining mango coulis and with a tablespoon dollop blobs over the cheesecake. Using a skewer or knife swirl your mango mixture to create a pretty pattern. Set in the fridge for 3 hours or until set. Its even better when set overnight.
Fruit mince pies are one of the most polarising desserts that exist and you either really love or really hate them BUT I promise that you will love my Fruit Mince Pie Gelato.Talking to friends and family I have discovered it is the taste of the mixed peel commonly used in commercial fruit mince pies that people don’t love and I definitely fall into the camp of really disliking it… yet I couldn’t stop eating this gelato.
My gelato recipe can be adapted to suit your dietary needs including dairy free, low fodmap, egg free and Paleo. This one can’t quite be made low carb sorry!
But you can take comfort in it having much less sugar than your typical gelato recipe.
50 g sugar of choice (we recommend raw sugar, increase to 100 g for sweeter)
200 g pure cream (pouring cream)
200 g milk
4 egg yolks
1 tsp vanilla extract
Fruit Mince Method
Add dried fruit to mixer bowl. Chop for 5 sec/speed 6/MC on. Scrape bowl down.
Add remaining fruit mince ingredients and cook for 20 min/100°C/speed 1/MC off. Allow to cool completely.
Gelato Method
If using granulated sugar, add to dry bowl. Mill for 30 sec/speed 7/MC on. Scrape mixer bowl down.
Add remaining ingredients [except fruit mince] to mixer bowl. Cook for 7 min/70°C or 160°F/speed 3/MC on.
At this stage, you can either churn your mixture in an ice-cream maker and add fruit mince mixture at the end of churning time or freeze in standard ice cube trays. Once frozen, blend for 1 min/speed 9/MC on or until combined—using spatula to help combine. Insert butterfly and whip for 5–10 sec/speed 4/MC on with the fruit mince mixture or until smooth. Return to the freezer if required.
Tip: When it comes to blending/whipping time, you may find your mix melting faster if it is a hot day. Watch your mix and stop it early if needed and return it to the freezer. We recommend a light coloured sugar for the best gelato colour.
Alcohol Free: Replace alcohol with extra orange juice.
Dairy Free/Paleo:Replace cream and milk with 400 g or 14.1 oz coconut milk.
Egg Free: Omit eggs and follow the thermal cooker method only.
Looking back on the year that was 2019, we’d like to thank every single Skinnymixer that helped build the Skinnymixers community and shared our recipes with friends and family. We now have over 185,000 Skinnies in our community!Thank you for helping us make Skinnymixers so special and we look forward to sharing more healthy Thermomix recipes in 2020. These are the ‘Top 10 Most Popular Skinnymixers Recipes’ from skinnymixers.com.au.
We all went a little Buffalo Chicken Wing crazy when this recipe was released in October this year and given a couple more months I’m sure it would be higher up the list!
We’ve seen so many different variations including using tomato sauce instead of the Chilli Sauce to make them very mild for the kids. Unfortunately my kids decided to taste these tasty wings and the delicious Blue Cheese Sauce… and loved them >.< !
How can something so simple and so little ingredients pack such a flavour punch?
This Strawberries & Cream Instant Ice Cream was a hit for Summer 2019. The beautiful thing about Australian summers is that our berries are also in season, and what could be better on a 40+ degree day than an instant strawberry ice cream in your Thermomix! Keep an eye out at the supermarket for cheap strawberries, pop them in the freezer and blitz this delicious summer treat up in a matter of seconds.
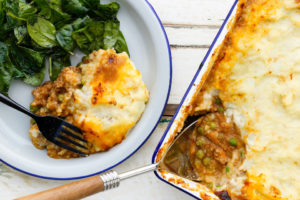
Holding steady at #6 the Rustic Shepherds Pie is a family favourite. Simple, classic flavours that is sure to be popular with fussy eaters (young and old). We included a special Family Shepherd’s Pie with Hidden Veg in The Healthy Mix IV cookbook.
You can easily adapt this recipe to add extra vegetables or make it low carb with the addition of cauliflower mash.
You can also freeze portions for a fast mid-week. Simply pop into the freezer after adding the mash on top and bake in the oven when ready to eat.
The Coconut Curried Sausages are a standard family favourite and often the reason for the great Babas Malaysian Meat Curry Powder treasure hunt.
Whether your family likes them extra mild or perhaps with chicken instead of sausages, there will definitely be arguments over the leftovers. For those that meal prep, this meal freezes and defrosts perfectly and is incredibly budget friendly.
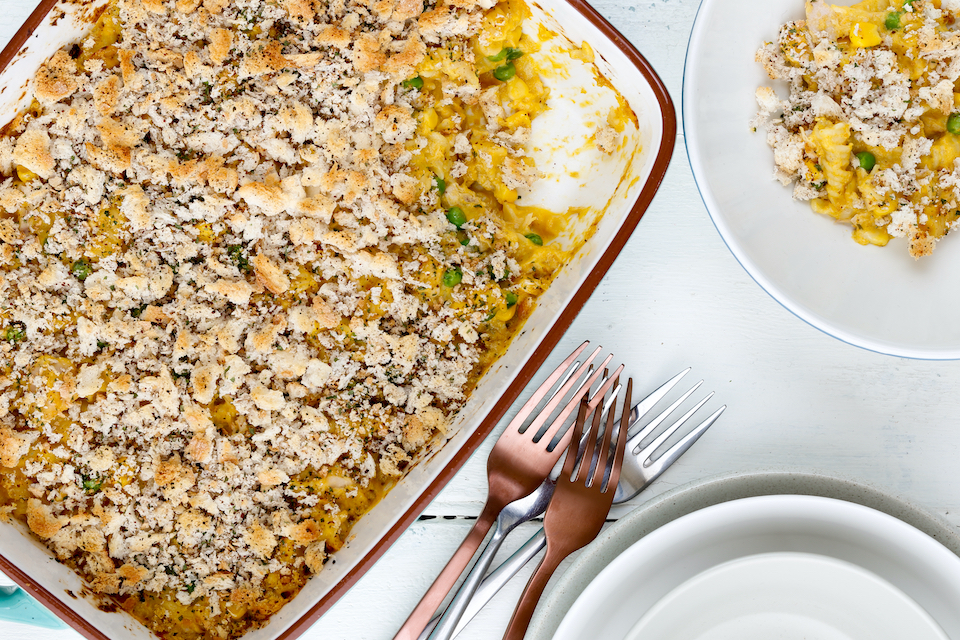
It seems the new updated version of this popular hidden vegetable Thermomix recipe, jumped it up to #2 in our Top 10. This recipe is popular with mums of fussy eaters. Give it a go and see if it is popular in your household. If your child doesn’t like the taste of cheese or prefers different cheeses, try different cheese combos.
Some other clever Skinnymixers have made the Macaroni Cheese with a Twist into frittatas perfect by following similar directions to the Risotto Frittatas with a Twist and adding egg to the cooled mix and baking in muffin tins.
This really is no surprise… Could the number #1 recipe be anything else than “The Butter Chicken”?
If you are new to the world of Skinnymixers or Thermomix, don’t be put off by the long ingredients list, set aside an afternoon and read through the comprehensive Butter Chicken FAQs if you are nervous. This recipe has been the reason for quite a few thermo cooker purchases. It is quite easy and straight-forward, once you get all your ingredients out ready 🙂
6 hoursmeal prep cooking including a lunch break, serving up, cleaning the kitchen, testing team duties & an extra trip to the shops – you should easily be able to do it in 5hrs. This was using a TM5 & TM31.
Our amazing Brooke is back again with another Thermomix Meal Prep Cook Up, this time it is from The Healthy Mix IV cookbook.
Once again Brooke has gone above and beyond, by providing the Skinnymixers Community with a step-by-step how to meal prep guide of what she did and a printable shopping list spreadsheet.
Thank you Brooke! (please make sure you show your appreciation by sharing it with everyone that you think would benefit)
Love Nik xx
P.S. If you need a Thermomix Travel Bag – I highly recommend checking out Brooke’s website Whole Home & her fantastic Travel bags for TM31 & TM5 that she designed.
The Healthy Mix IV is fantastic for fast, weeknight dinners.
5 months later Nan had a bare freezer again, it was school holidays and I had lots of cooking to do but no freezer space at my own home. So it was the perfect opportunity for another bulk cook.
84 portions of food later ready for freezer stash, my grandmother will be set for a few months or so.
We spent just under $200 on shopping from the butchers and Woolies (inc containers) for all ingredients except for some Skinnymixers Chicken Stock Concentrate (THM1) and spices (I bagged these up from my house before going on holidays).
This worked out to a mere $2.25 per portion.
As I am a Skinnymixers development team tester I had plenty of dishes I need to test so it was a perfect opportunity to re-stock Nan’s freezer and get my testing duties completed.
I choose the following meals with a couple protein subs to suit Nan’s likes and we added some sides as individual serves ready to go are best for Nan so she can just grab, heat and eat on the fly. We made 9 different dishes as I needed to get some testing recipes done but ideally I’d stick to 6 and double up some instead. I have bulked out these dishes with additional sides to increase the vegetable intake and stretch them further to save money.
This cook up took around 6 hours including cleaning, serving, labelling and lunch. I was measuring, taking process photos, other testing duties along the way plus a quick trip to get some more containers so should knock it over in less than 5 hours.
I changed the beef to chicken for this. Chicken can be subbed and cooked for 8 minutes. Do not increase the quantity of chicken or it will shred and cook inconsistent. I cut in medium-large slices.
Served individual meals served with rice and stirfry veg.
We split this meal into foil containers (double serves). We didn’t bake at so they popped into the oven to finish off and serve with a fresh salad or vegetables.
We split this meal into foil containers (double serves). We didn’t bake at so they can be popped into the oven to finish off and serve with a fresh salad or vegetables.
I choose to replace the potato with sweet potato. I double the amount and cooked in the varoma, then mash 2 batches of mash using the sweet potato mash method.
Prepared all the spices required for each recipe and a fresh batch of chicken stock concentrate as I was travelling.
Prepared a shopping list.
Reviewed fridge, pantry and freezer contents (which was pretty much zip).
Ordered online shopping with Woolworths for click and collect the day before and picked up the meat from the local butcher.
Planned the order of what to cook in what thermomix/slow cookers/appliances to best utilise the time
Also don’t forget the freezer space needed to store the meals, so clean out prior to cook up day.
Cooking Day
Get the slow cooker recipes on first then move onto the Thermomix recipes.
Prep as much as you can as most of these recipes are quick cooks, ie. Peel that bag of onions, those couple cloves of garlic at once.
Use all leftover vegies as sides.
Shopping List
Download your printable Shopping List spreadsheet when you subscribe to our Skinnymixers Mailing List – click here or the image below.
Cooking
Preparation & planning is the key to a productive cook up.
Slow Cooker 1
Hungarian Goulash
Slow Cooker 2
Lemon Ginger Chicken
Thermomix 1
Swedish Meatballs
Chow Mein
Tuna Mornay
Steamed Vegetables
Thermomix 2
Shepherds Pie
Mongolian Chicken
Sweet & Sour Chicken
Caprese Stew
Sweet Potato Mash
Non thermie jobs in between
Cut up chicken
Prep all vegetables
Roll meatballs
Cook penne
Cook rice
Cook stirfry vegetables
Dishes
Serve up & label
Tips for Freezing
Allow meals to cool slightly before serving into dishes.
Allow to completely stop steaming before putting on lids.
Further cool in the fridge before freezing (day/over night).
Use appropriate sized containers so they are full.
You can use glass or higher quality plastic containers should you wish and the budget allows.
Tips for Reheating
Ideally defrost in the fridge first then can microwave heating evenly.
Yes everything freezes and reheats well.
Other FAQS
Q: Do you have more than 1 thermomix?
Yes, I used 2 Thermomixes with 2 jugs each, 2 slow cookers, stovetop and an electric fry pan. 2 Jugs are a luxury, you could empty a jug into a container and continue on.
Q: Wow must have a huge freezer?
No, they stacked really well and only took 4 drawers of space in a side by side french fridge/freezer.
Other resources that you might find helpful for meal planning:
Sausage rolls were my go to bakery choice growing up as a kid and I will still occasionally indulge in one on a road trip.
I love the idea of a more adult sausage roll mixture in to celebrate Australia Day, but there is still a good amount of veggies in this Thermomix recipe to ensure its a healthier choice. This Sausage Roll Thermomix Recipe is only for the filling.
You may choose to use puff pastry, gluten free puff pastry or shortcut pastry to make Sausage Rolls.
The Filling is also delicious made into meatballs for snacks/lunchboxes or burger patties. If cooking in a pan, cook slowly on medium to low heat to avoid the sugars in the apple browning too quickly.
If you are looking for more Australia Day Thermomix recipe inspiration, you might like to check out:
50 g bread ((optional) I used sourdough, gluten-free if required)
1 handful continental parsley
100 g green apple (cored, roughly chopped)
1 small carrot (roughly chopped)
100 g zucchini (roughly chopped)
500 g pork (mince)
1 egg
2 tsp onion powder
1 tsp garlic powder
2 tsp salt
1/2 tsp ground white pepper
Add fennel seeds to dry mixer bowl, mill for 30 sec/speed 9/MC on.
Add bread and parsley. Chop for 30 sec/speed 9/MC on. Set aside.
Without washing bowl, add apple, carrot and zucchini. Chop for 2 sec/speed 9/MC on. Scrape bowl down and repeat if needed. It should be a fine chop.
Add remaining ingredients, including reserved bread crumb. Mix for 4 sec/speed 4/MC on or until just combined. At this point you can choose to put it in puff pastry, short crust pastry, form into meatballs or fry in a pan for very yummy mince!
Welcome to the official “Nik’s Favourite Things” of 2019!
I like to do this every year to celebrate the products and companies I discovered throughout the year – some of these I fell in love with so much that I became affiliates of them, others are just things I use around the house! I am not being paid to recommend anything.
Feel free to add your favourite products of 2019 in (No self advertising, we will delete these!)
10% OFF Discount Code_ SKMIX
Here it goes in no particular order, affiliates first…
Grandmas Pantry Spice Packs
The best company and always doing the best by us Skinnymixers. If you need to get the ingredients together for all of the Skinnymixers cookbooks, their spice packs are the way to go. You will save tonnes of money and have better quality.
I started working with Everten a few months ago, and I am amazed by their huge online range of kitchenware products, their passionate customer service and also how their prices are considerably cheaper than everyone else.
If you’re a girl or guy with curly hair, and you aren’t getting the most out of your natural curls, check out Clever Curl. I was always very off put by the “curly girl” method because it just seemed too overwhelming, with way too many different products out there to try.
This Australian company has taken the guess work out of it with their simple, complete range of Curly girl approved hair products.
I was lucky enough to be sent some WOLL frying pans to try out from Everten and I have fallen in love with them ever since.
They’re the best pans I have owned.
They are German made, extremely high heat and scratch resistant and have a really cool removable handle so they can go in the oven easily. They have both standard and induction compliant. everten.skinnymixers.com
OXO Good Grips Julienne Peeler from Everten
Julienne Peeler
With summer and the launch of The Healthy Mix IV I have found myself turning to my Julienne peeler weekly!
I think they are a must have kitchen item, especially if you love the Vietnamese Beef Salad.
Meater
MEATER
I got a Meater 6 months ago when I started writing The Healthy Mix IV and it was what enabled me to get such perfect results with the Vietnamese Beef Salad!
If you haven’t got yourself a meat thermometer, I highly recommend this one.
I know I said this last year, but I love this car so much. If you need a 7 seater diesel, I cant recommend this car highly enough. It is SO beautiful to drive and the features rival those of the luxury European equivalents. I have the Asaki model.
Macadamia Milk
I started using Macadamia Milk this year in an effort to reduce my dairy intake but maintain my caffeine intake. I think its the BEST cows milk substitute on the market.
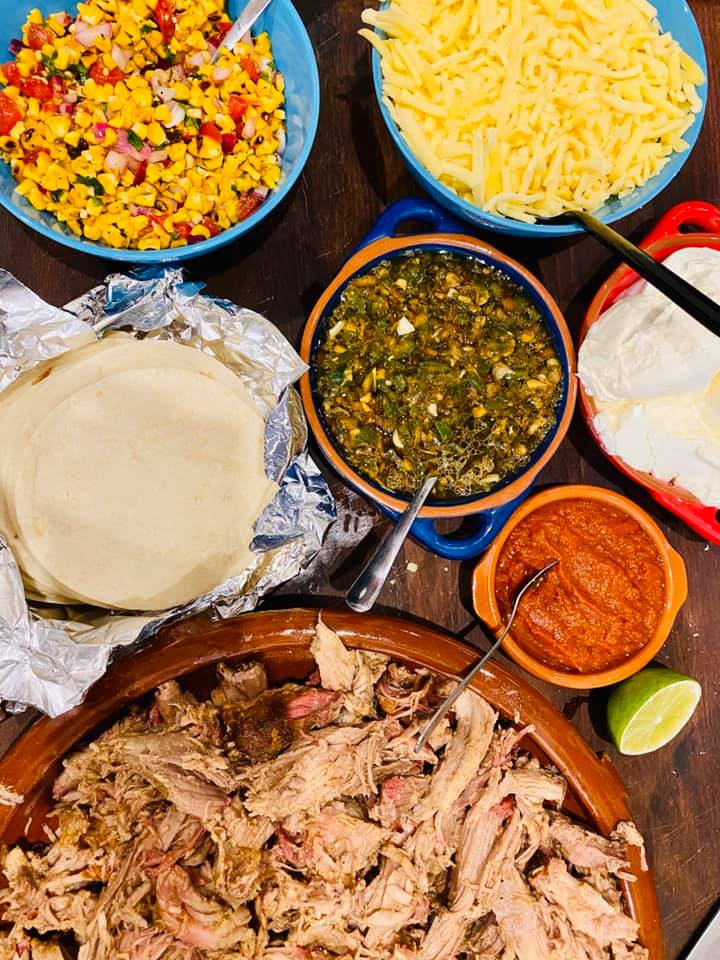
We spent the day cooking a Mexican feast from my cookbookA Little Taste of Mexico and developed a new BBQ Corn Salsa recipe to accompany the delicious Smoked BBQ Pulled Pork.
A massive day cooking from my cookbook A Little Taste of Mexico. Recipes from top to bottom: Corn Salsa, Jalapeño Salsa, Chipotle Salsa & Low and Slow Smoked Mexican Pulled Pork.
I’ve provided cooking instructions for the corn to be smoked Low & Slow or steamed in the Thermomix.
You might like to alternatively char your corn on a grill/BBQ if you don’t own a smoker.
I highly recommend making this salsa a couple of hours in advance to serving so the flavours have time to marinate and really pop.
I know the Low & Slow cooking instructions do seem like a little bit of extra effort for some corn, but I promise it is worth it and you can cook your pulled pork at the same time.
If you do try it, please leave me a comment below and let me know what you think!
Keep corn in their jackets and smoke at 250° F for around 2 hours. You can strip the husks and silks after smoking and char on an open flame if you desire.
When corn is cooked, cut kernels off and combine in a bowl with remaining ingredients. I recommend doing this at least a few hours before serving for best results.
Thermomix
Add 300 g water to mixer bowl. Place prepared corn in the deep steaming tray and cook for 20 min/steaming temp/speed 2, or until tender.
When corn is cooked, cut kernels off and combine in a bowl with remaining ingredients. I recommend doing this at least a few hours before serving for best results.
My Mexican Slow Cooked Mexican Pulled Pork has been a popular recipe in the Skinnymixers and Thermomix Community for a few years now, so when the opportunity came along to convert it to BBQ Low & Slow Mexican Pulled Pork with The Smoking Joint I jumped at the chance! To quote Hollywood from The Smoking Joint competition BBQ team “Low and slow takes lesser cuts of meat, and turn them in to high quality meals.” We cook these meats for a long period of time, which means that the rubs change dramatically, sugars and herbs tend to burn.
To avoid that, we recommend removing the sugar from this rub and replacing it with honey at the wrapping stage. We chose to use applewood for smoking and we cooked it at a temperature of 121.1°C |250°F for 3 hours.
My Traeger Timberline 850 has been getting a workout
At the 3 hour mark, we put the pork in a metal tray with 50 g honey and 1 cup of pineapple juice, wrapped it tightly with alfoil and continued to cook until an internal temperature of 91.1°C |196°F was achieved. You know the pork is ready when probing it feels like butter all over.
Once it feels like butter, we rested (still wrapped) it in an esky for 1-2 hours then pulled it through its juices – taking care to remove excess fat. Seasoning with extra salt at this stage is important for taste.
We recommend serving this with BBQ Corn Salsa, jalapeño salsa, street tortillas, sour cream and shredded cheese.
A massive day cooking from my cookbook A Little Taste of Mexico
6Tbspcourse sea salt flakes or Kosher saltI used Malden
4Tbspchipotle powderor smoked paprika
4tspground cumin
4tspdried oregano
4tsponion powder
4tspgarlic powder
⅛tspcinnamon powder
⅛tspcayenne powder
Basting
1cuppineapple juice
50ghoney
Instructions
Preheat your smoker to 121.1 °C or 250°F if you need to preheat
Add all Spice Rub ingredients into a bowl and mix together.
Score fat on the meat, rub all over with mustard and liberally apply spice rub to your meat and allow to sweat for 15 minutes.
Place meat in the smoker fat side up. We chose to use applewood for smoking and cooked it at a temperature of 121.1 °C or 250°F for 3 hours.
After 3 hours, place the pork carefully in a metal tray with honey and pineapple juice. Wrap tightly with alfoil and cook until it reaches an internal temperature of 91.1°C or 196°F. You know the pork is ready when it feels like butter when probing.
Once it feels like butter, rest (still wrapped) in an esky for 1-2 hours.
Pull the pork and mix through the juices - taking care to remove excess fat. Season to taste with salt.
The Smoking Joint invited me to assist them with an in store competition at Barbeques Galore this past weekend. We decided that my Jerk Chicken from The Healthy Mix IV and a fresh Mango Salsa would be a winning combination! We weren’t wrong..
As you know I’m not the biggest fan of fruit teamed with meat (that’s why the Apricot Chicken took years of convincing from Skinnymixers), but I have to say this Mango Salsa is so delicious and really does add something special to your next BBQ.
This recipe does not need a Thermomix and is perfect to prepare the day before for a BBQ.
Sometimes it is necessary to stick to the pantry basics, whether it is a bit of a tight money week or you might not have access to a range of items – here are the Top 10 Pantry Basics Thermomix Recipes. Here are some recipes to transform some cans of chickpeas, lentils, beans or tomato paste – into delicious meals.
#1 Butter Chicken / Butter Chickpeas
Butter Chicken
If you have plenty of time on your hands but not too much chicken, why not make Butter Chickpeas? Put that Skinnymixers Spice collection to good use and whip up the famous Skinnymixers Butter Chicken.
Add some drained tinned chickpeas to the Butter Chicken Sauce to bulk out the Butter Chicken Sauce with some cauliflower and roasted pumpkin. If you don’t have any butter or cream, it is delicious using olive oil and coconut cream.
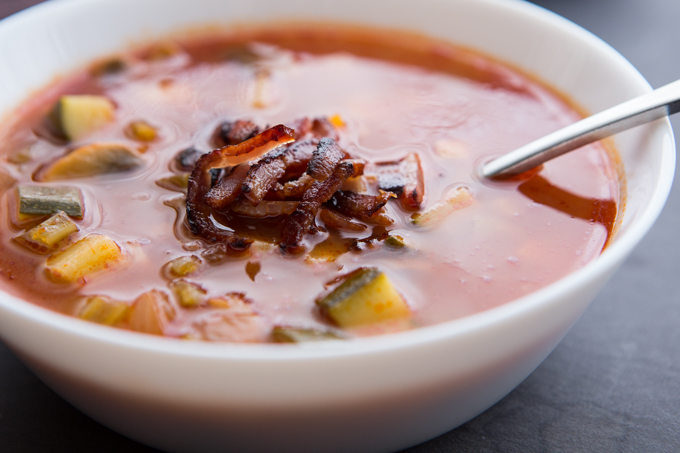
The Bacon & Vegetable Soup has been popular in Skinnymixers for a few years now & also features in The Healthy Mix I.
Not only is it perfect for using up sad vegetables from the fridge, it is extremely budget friendly. Using only a small amount of bacon, some pasta and some pantry staples – you have a hearty, warming soup that the whole family will enjoy.
If you love this Soup you should also try the Minestrone recipe from A Little Taste of Italy, you will find your new favourite!
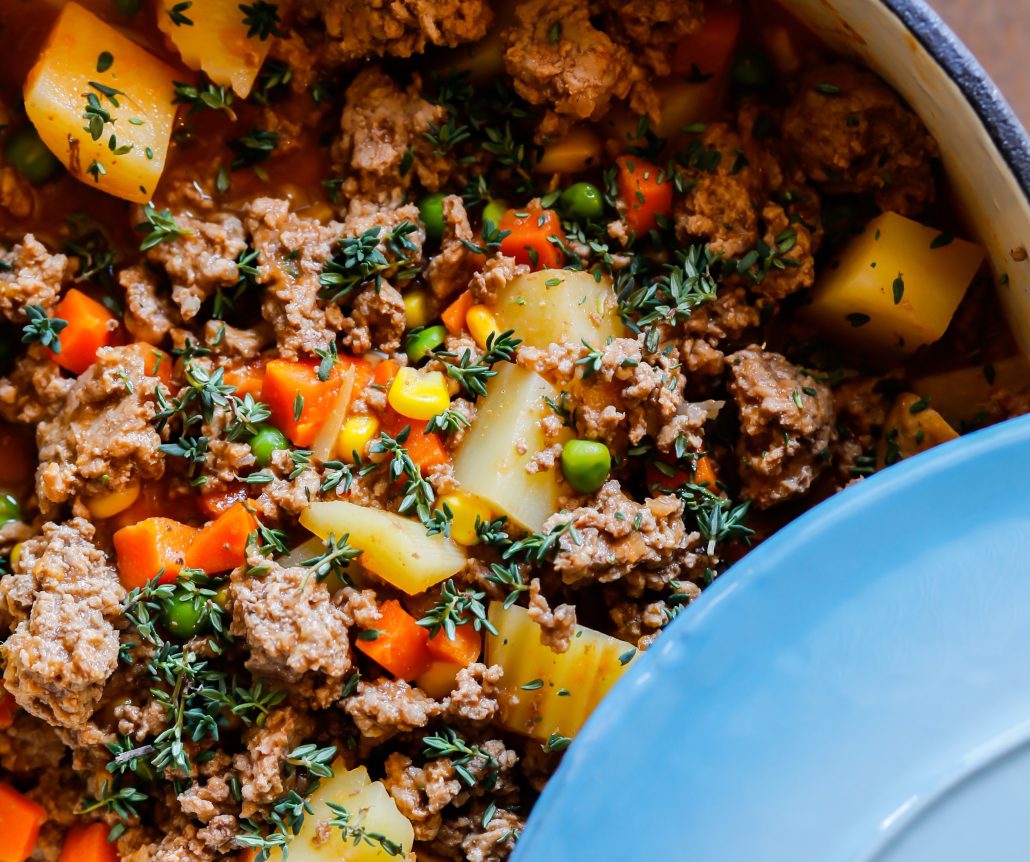
This Savoury Mince Thermomix recipe makes a huge amount of food using some simple kitchen staples. Using frozen vegetables makes this dish extremely budget friendly and you can adapt it to whatever herbs and vegetables that you have on hand. Don’t be afraid to adjust to your families tastes if you would prefer to add some Babas Curry Powder.
You can serve Savoury Mince on mash, rice, pasta or even on toast. Transform leftovers into delicious pies or even a pasta bake using the Healthy Carbonara Sauce for extra hidden vegetables!
If you don’t have any mince, this recipe from The Healthy Mix III actually has a vegetarian variation that utilises lentils. You could also use some lentils to bulk out this dish to make it go even further!
Next time you are at the supermarket grab a bag of frozen cauliflower to keep on hand for this fast & delicious Healthy Carbonara Sauce from The Healthy Mix I. Big on flavour, low on carbs you can pan fry some chicken, bacon or even mushrooms (if they take your fancy??)
Serve this tasty sauce with zucchini noodles, pasta or even over pan-fried chicken breast.
One of the most requested recipes, Nikalene kept putting it off as she just didn’t like eating tinned Tuna.
I still remember the day that Nik developed this recipe… the grumbling about doing it and then the excited post afterwards saying how good it tastes LOL!
If you have some slow cooker cuts of meat to use and need a tasty sauce made out of pantry staples, you can’t go past the Skinnymixers Hungarian Goulash recipe.
Delicious with lamb shanks, beef brisket, diced beef or even chicken thighs. Make the most of some of the cheaper cuts of meat and pop the sauce in the slow cooker for the day!
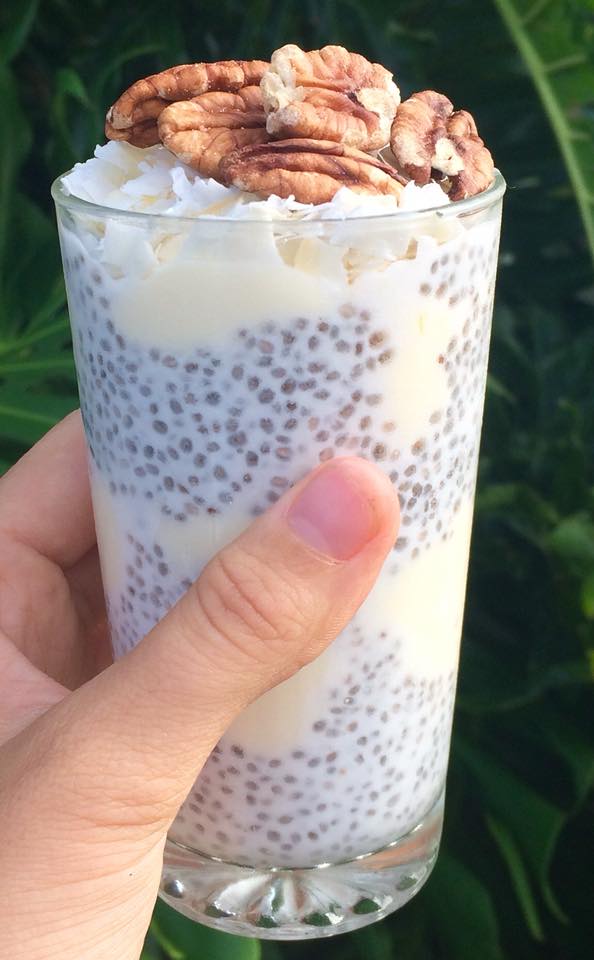
I just love the Skinnymixers chia pudding as an afternoon snack to get me through until dinner. Today I had it layered with yoghurt and topped with flaked coconut and pecans
Looking for a dairy free, gluten free snack to help keep you feeling full during the day?
This Coconut Chia Pudding is not only healthy, but can be made from pantry staples.
With everything happening in the World I thought it was a good time to blog my favourite super budget friendly, pantry staple Thermomix recipe – Red Lentil Dahl.
Dahl is a hearty, super healthy vegetarian dish that is packed full of protein but easy on the budget.
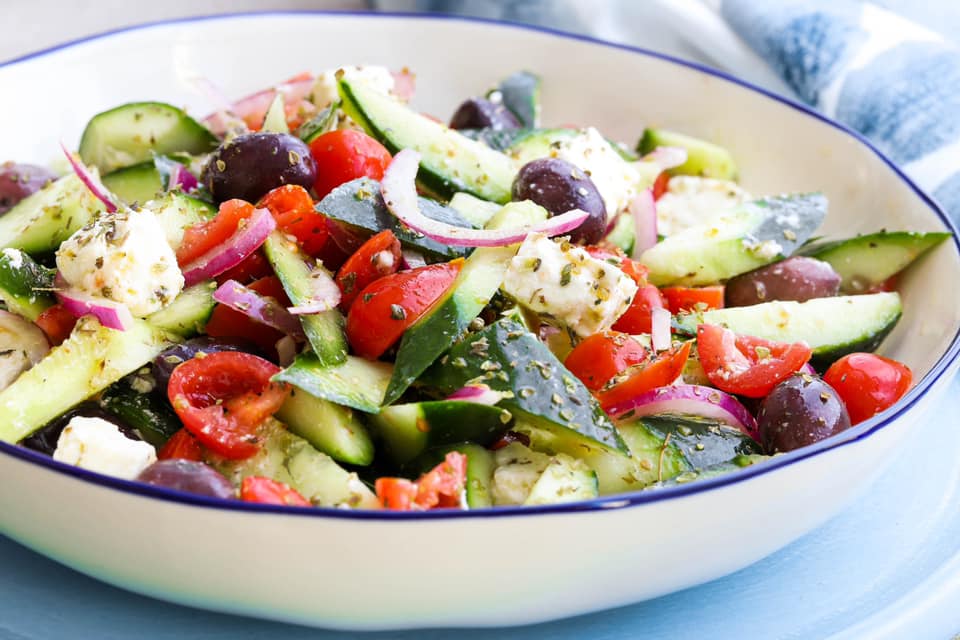
Greek Salad is something so simple and obvious to me, that I never thought to do a recipe for it on the website until I asked in the Skinnymixer’s Facebook Group the other day and had hundreds of Skinnies wanting my recipe.
I love to serve this Greek Salad with a beautiful reverse seared Steak, Greek Slow Cooked Lamb or a simple grilled fish or chicken.
Try to make this salad an hour ahead of serving to allow the flavours to marinate.
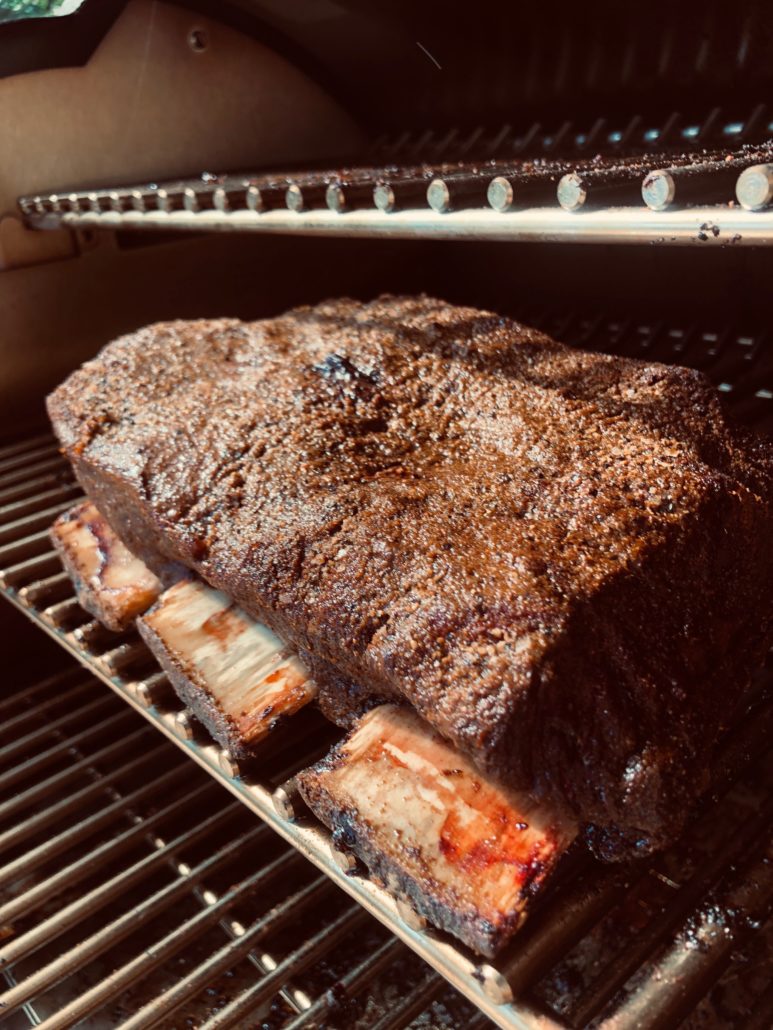
My Smoky BBQ Beef Ribs have been a huge hit in the Skinnymixers community, ever since Costco came to Australia and popularised beef short ribs in our homes. It was a natural choice to convert it to BBQ Low & Slow Smoky Beef Ribs with The Smoking Joint because I knew the recipe was amazing, and I knew that smoking it would take it to the next level!
We choose to use oak or cherry wood for smoking and we cooked it at a temperature of 121.1°C |250°F for around 6-7 hours.
Take a look at the awesome videos that Hollywood put together to help with how to prepare this recipe.
I have been really enjoying converting my old recipes to Low and Slow with the team from The Smoking Joint, and despite the social isolation we are still producing amazing results remotely as a team.
Smoky BBQ Beef Spice Rub
If you are interested in seeing how we did it, check out The Smoking Joint on Facebook or Insta.
Hollywood has produced some great videos with his adorable kiddos on prepping the meat etc.
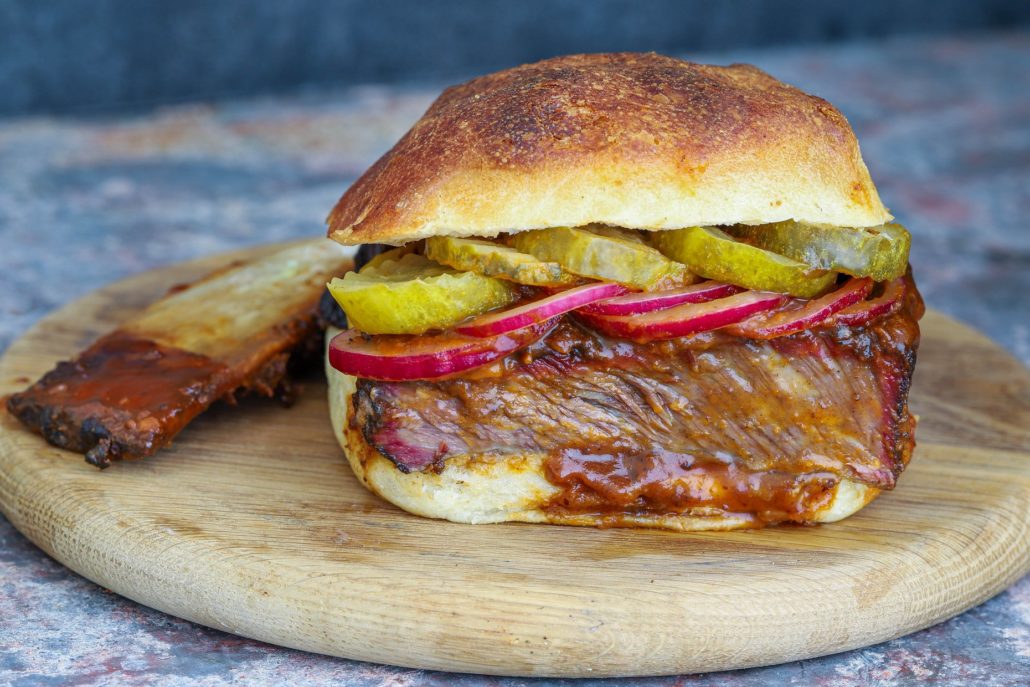
The Perfect Sandwich – Part 3 the talent
We cooked along together, remotely, for our families today and turned the end results in to a “McRib” – the perfect sandwich… beef ribs, pickled onion and pickles!
Smoky BBQ Beef Ribs cooked in the Traeger
Sian says – Comment below if you think Nik should give us a Pickle recipe….
Rub liberally with spice mix and wrap it tightly in glad wrap. Put it in the fridge for 1 hour. Then remove glad wrap.
Put prepared rack in your smoker, unwrapped, bone side down at 250°F or 121°C for 3 hours.
Put your rack in to a small Alfoil tray and add your beef stock around the rack to be around 3-4mm deep. If you have it put a piece of wax paper on top of the ribs to preserve bark. Wrap tightly with alfoil and punch a few holes to let steam escape.
Cook for another 3-4 hours or until an internal temp of 205-210°F or 96-98°C is reached.
Rest your ribs, still wrapped, in an esky or cold oven wrapped with a towel for 1-2 hours.
Prepare Smoky BBQ Sauce by putting all ingredients into the mixer bowl and cooking for 5 min/steaming temp/speed 3/MC on. Bring to a gentle boil on the stove top if you don't have a thermal cooker.
Sian has been telling me that I HAVE to write a KFC recipe for years, and because every other person out there has one… I’ve always said no. This Southern Not Fried Chicken is so TASTY!
Recently I ran a poll in Skinnymixers to see which protein was the easiest to get in the supermarkets consistently right now, and lots of people said Chicken Drumsticks or Wings – so I set out to create a simple pantry staple rub to complement these.
Loosely inspired by the KFC recipe on wikipedia, I think that this recipe is so delicious that I have to say…
Preheat oven to 120°C or 250°F, fan-forced. Line a baking tray and place an oven proof wire rack on top.
Add all rub ingredients to mixer bowl (except chicken) and mill for 20 sec/speed 9/MC on.
Pat chicken with kitchen paper so that they are as dry as possible and put in a large bowl.
Toss chicken through rub in bowl and place on rack in a single layer (its ok if they're touching, they shrink) to cook in the oven at 120°C or 250°F for 30 minutes.
Increase oven temperature to 220°C or 430°F and cook for a further 30 minutes or until an internal temperature of 74°C - 94°Cor 165°F - 200°F is reached. Alternatively cook in the airfryer in batches at 200°C for 17-20 mins turning halfway, until chicken is cooked.
Notes
Chubbymixers - If you were wanting to have Fried Chicken.... replace baking powder with 2 cups of white flour and 1 Tbsp salt. Soak in buttermilk for 2 hours, then coat in flour mixture. Opt to either bake, pan-fry or deep fry.
A Little Taste of Greece 😍🇬🇷🍋🥘 is coming in May & we are gifting away 100 signed copies to celebrate hitting 190,000 Skinnymixers on the weekend!!
You can win a copy for you and a friend by commenting/tagging on the official Giveaway Post on my Nikalene Riddle Facebook Page. You can enter as many times as you like & make sure that you share the post to help spread the word!
I’m so excited (and a little nervous!) to finally be able to share this with you!!!
We are still finalising the last of the variations but #ALToG is full of family friendly & affordable recipes from my childhood. Including:
⭐️ Moussaka (eggplant bake)
⭐️ Pastitsio (pasta bake)
⭐️ Saganaki Prawns
⭐️ Souvlaki
⭐️ Yemista (stuffed capsicums)
⭐️ Keftedes (meatballs)
⭐️ Avgolemono (lemon chicken soup)
⭐️ Spanakorizo (spinach rice)
⭐️ Lemon Oregano Potatoes
⭐️ Kolokithokeftedes (zucchini feta fritters)
Full contents, dietary variations list & release date to be released ASAP 😉 Winners will be announced each night in Skinnymixers this week.
Love Nik xx
Win! 1 of 100 Signed A Little Taste of Greece Cookbooks. Pre-sale starts in May
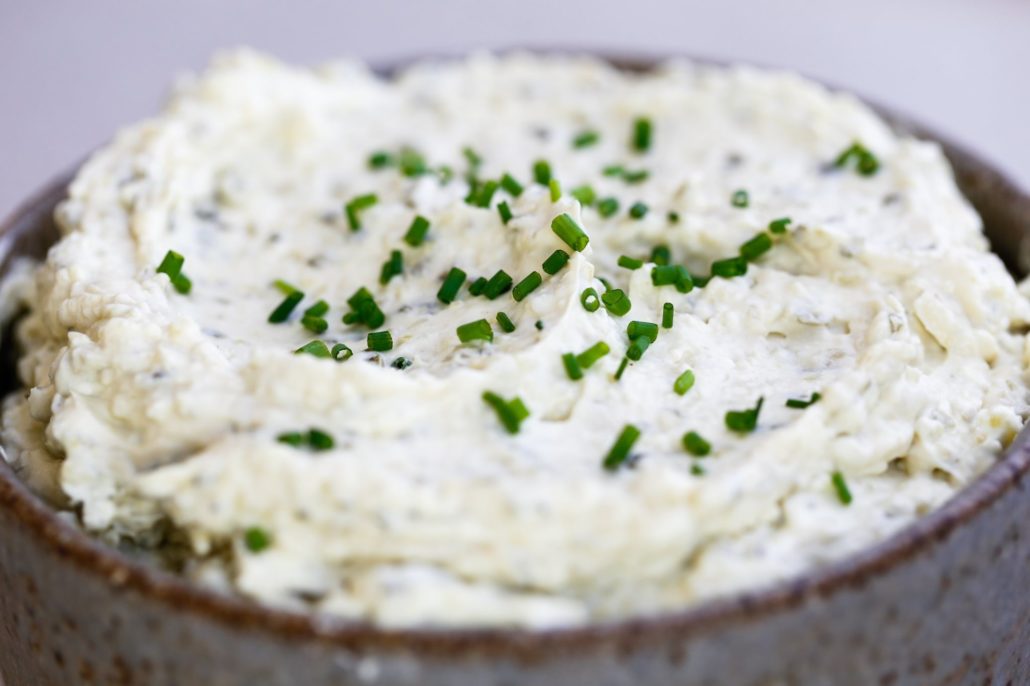
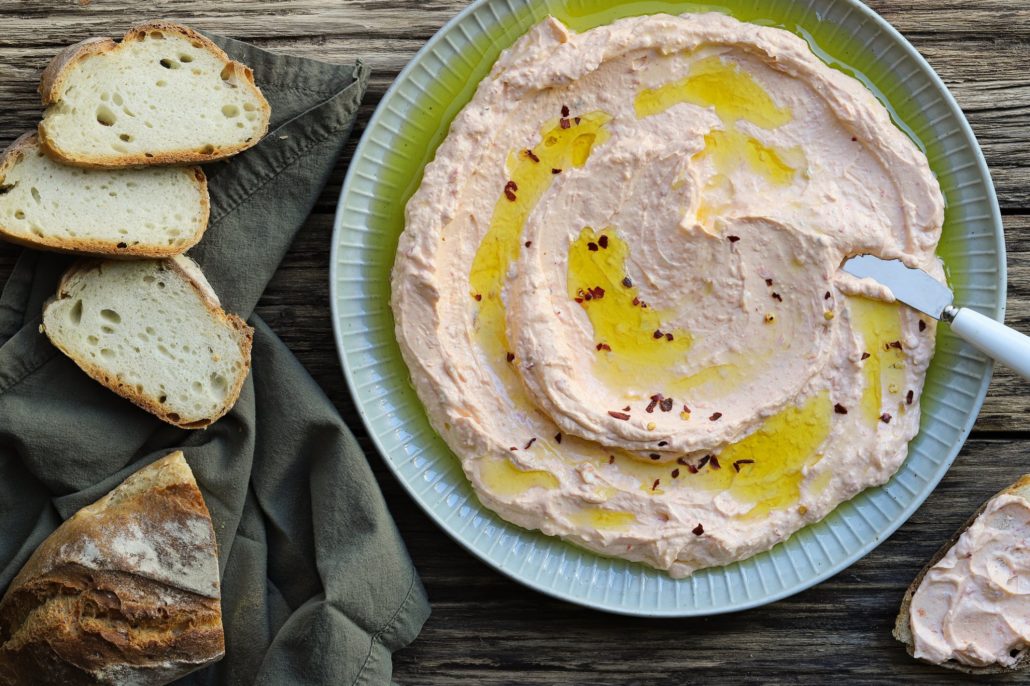
Spicy Feta Dip (Tirokafteri) – While doing research (AKA eating out at restaurants!) for my Greek book (A Little Taste of Greece – out in May!), I kept seeing Tirokafteri on menus and learned that it was a chilli feta dip. This isn’t something I ate growing up or something I had really noticed on menus before – so I knew I had to try it as many times as I could and then create my own version.
So here it is… Spicy Feta Dip or Tirokafteri to enjoy as a dip, on a yiros/gyro or as a sauce even.
I am so excited to be sharing the contents of my 11th book – A Little Taste of Greece🇬🇷😍 with you !
⏰Pre-sale begins on Friday the 22nd of May at 8pm SA time, this book is full of family friendly & affordable recipes from my childhood. I’m so excited (and a little nervous!) to finally be able to share this with you!!!
Like all my books, every recipe is Gluten Free ❤️
Variations include
☑️ dairy free
☑️ gluten free
☑️ nut free
☑️ egg free
☑️ low carb
☑️ super skinny /low calorie
☑️ paleo
☑️ vegetarian
☑️ low fodmap
☑️ refined sugar free
☑️ slow cooker
☑️ air fryer
☑️ halved
Let me know what you think of the contents, I hope you’re as happy with the final line up as I am!
P.s these dietary codes apply either directly to the recipes, or signify that we have given instructions on how to meet multiple dietary requirements.
On Friday the 22nd of May at 8pm SA time, the Skinnymixers Shop will re-open (we close it for 24hrs prior) with A Little Taste of Greece available to be purchased for pre-sale. There will be newly updated bundles for the complete A Little Taste of Cookbook Series and also the new Complete 11 Cookbook collection.